Exchange Mailbox Migration Csv Format
Batch Migration Of Exchange Mailboxes Using Csv File
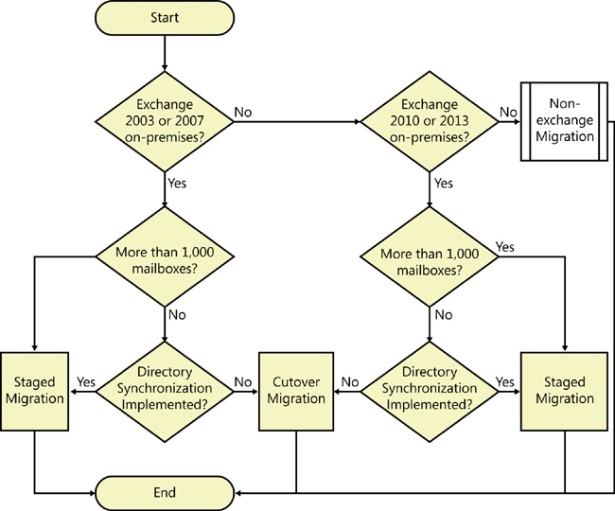
How To Configure A Migration Job Match Mailboxes Codetwo Exchange Migration User S Manual

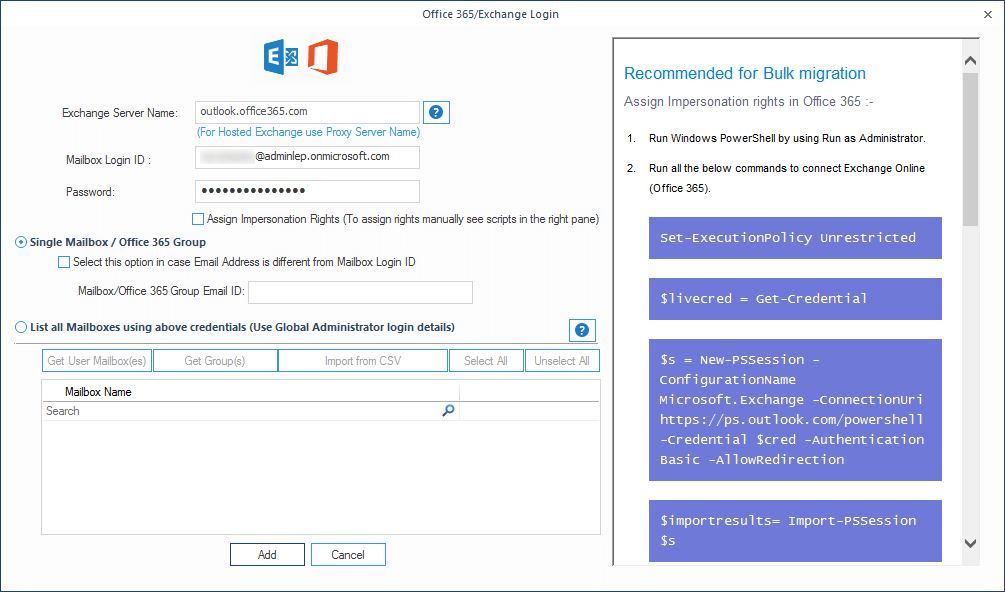
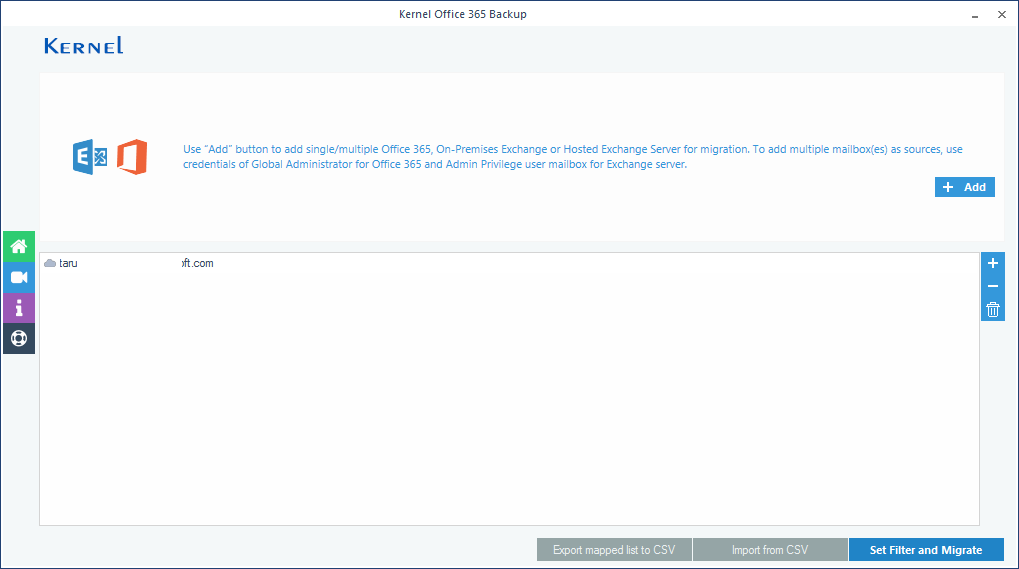
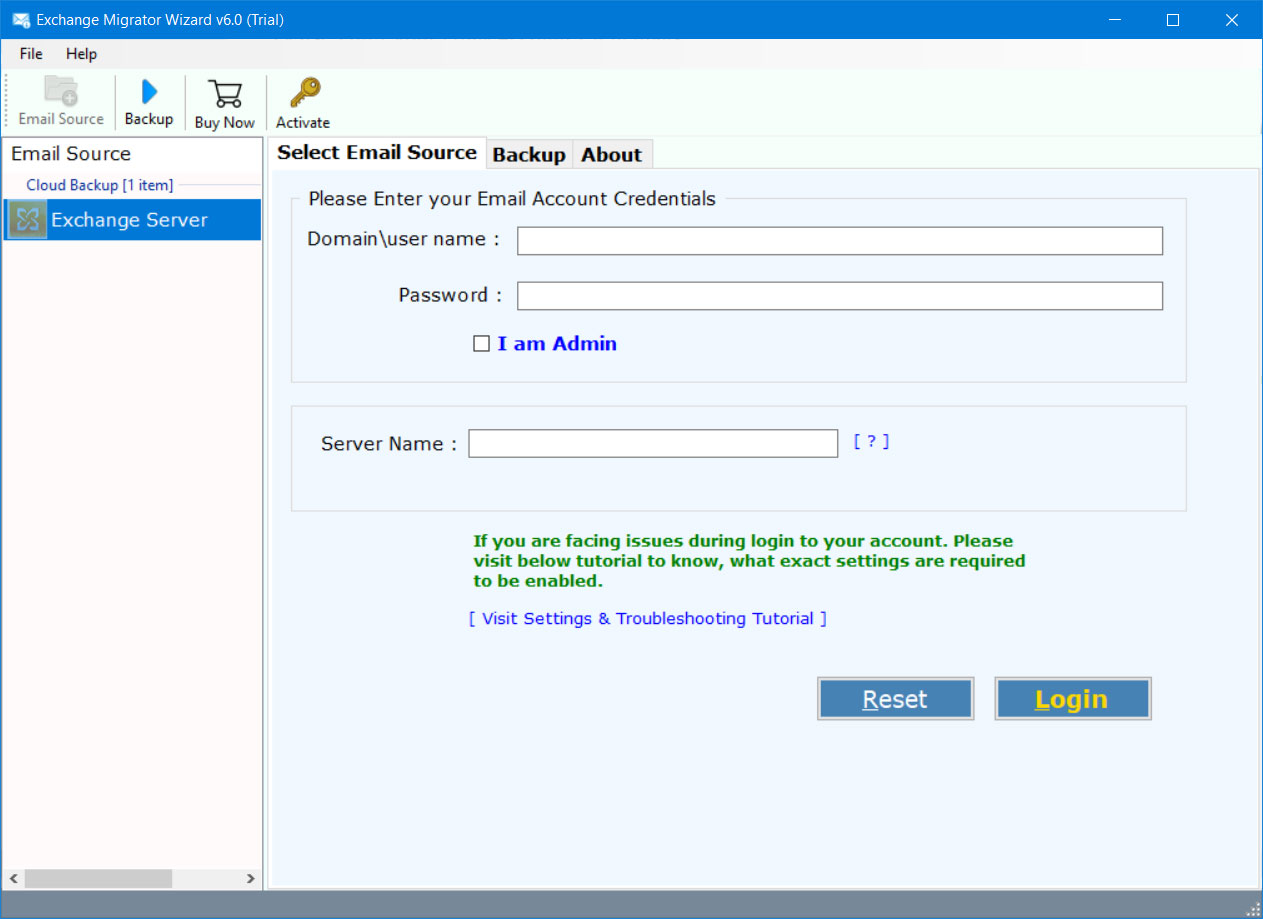
Connect To Exchange Server Using Csv File For Multiple Mailboxes Migration

Automatic Mailbox Migration Exchange Server 2016 The It And Powershell Blog
How To Configure A Migration Job Advanced Settings Codetwo Office 365 Migration User S Manual
Https Srodonoffice365 Files Wordpress Com 2016 04 Exchange Staged Migration Step By Step Pdf

Migrate email from an imap server to exchange online mailboxes.
Exchange mailbox migration csv format. You can specify a csv file when you use the exchange admin center eac or the new migrationbatch cmdlet in exchange online powershell to create a migration batch. Csv files for mailbox migration. But it s a good idea to migrate users in several smaller batches. With that list you can get more information about the mailboxes of the users.
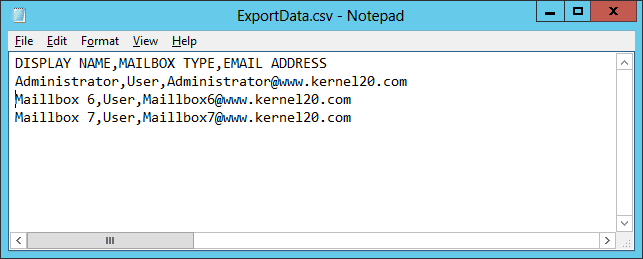
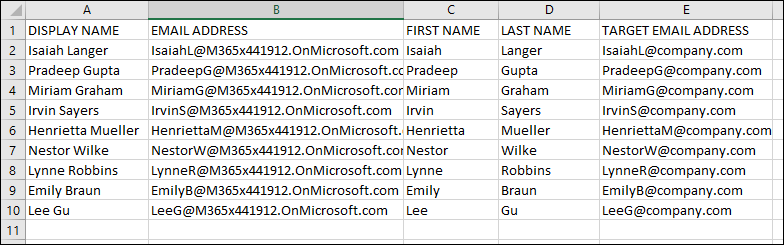
The header for this column must be named emailaddress. Each row in the csv file that you use to migrate on premises exchange mailboxes to the cloud in a staged exchange migration should contain information about the on premises mailbox. You need to export a list of mailboxes to a csv file in exchange server. If you re going to.
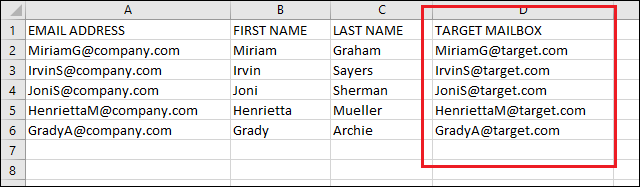
After you select a csv file microsoft 365 or office 365 checks the csv file to make sure that. Batch migration involves the use of a csv file containing both the source. A local move request for mailboxes that are specified in a csv file is known as a migration batch and uses the new migrationbatch cmdlet. A csv file for an imap migration batch can have maximum of 50 000 rows.
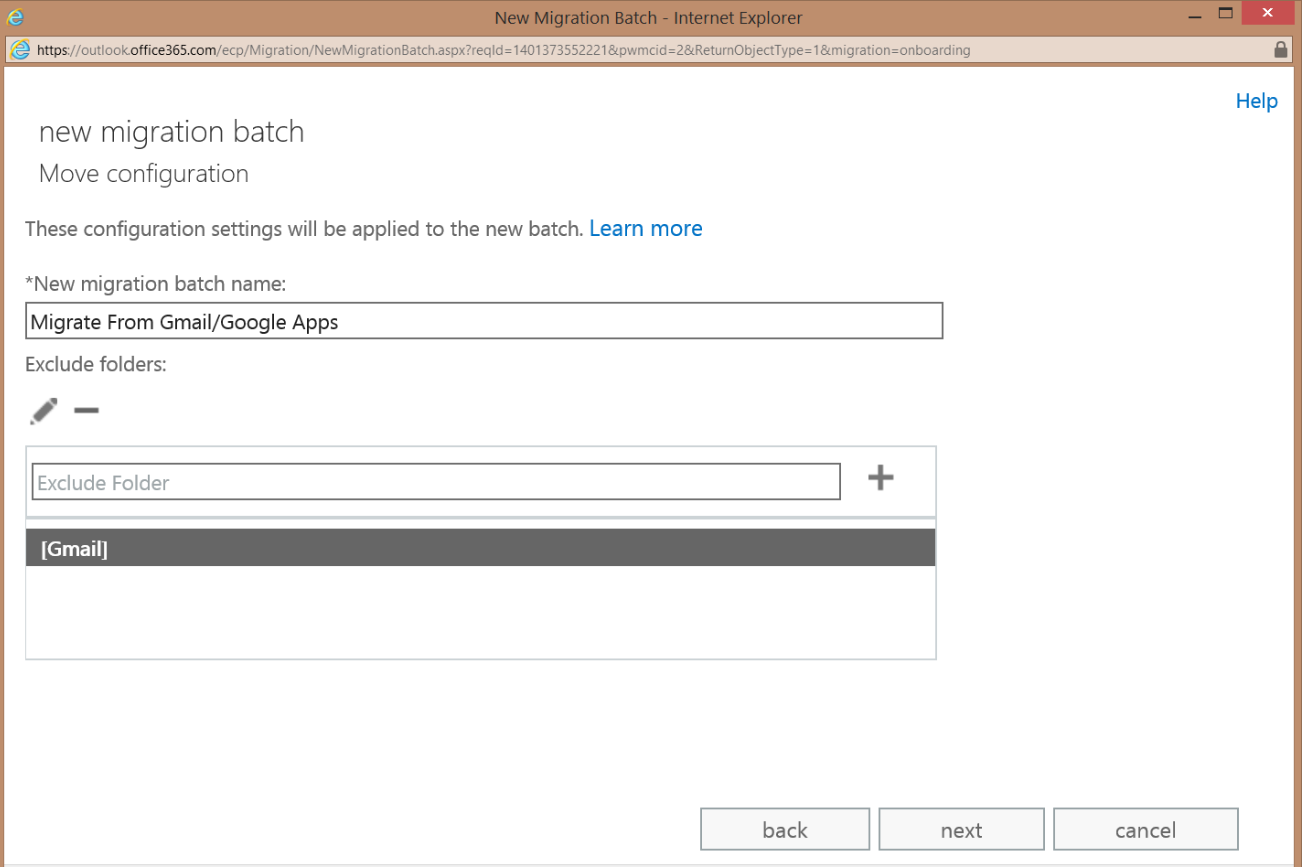
Manually moving them would be a difficult task. On the select the users page choose browse and select the csv file to use for this migration batch. So you need a different approach to migrate multiple mailboxes. For more information about the csv file requirements for local move requests see csv files for mailbox migration.
For more information about imap migrations see the following topics. You can use a comma separated values csv file to bulk migrate a large number of user mailboxes. Export a list of mailboxes to csv through powershell. It uses comma separated.
In this article you will learn how to do it through powershell. This csv file contains a single column with the email address for the mailboxes that will be moved. Choose new migrate to exchange online. Prepare a csv file.
That is why you need to perform a batch migration. Many times exchange administrators have to move mailboxes in bulk to a different database. Such a list can be important. On the select the mailboxes screen locate the csv file that you created in step 1 and then click next.
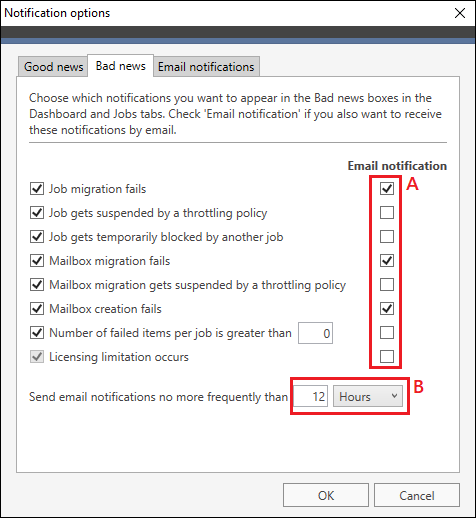
To export this list to a csv file click the ellipsis button and from the drop down menu choose export data to a csv file fig. In the window that opens tick checkboxes next to the user data you want to export fig. On the select a migration type page choose staged migration next. Use the exchange management shell to create a local move request from a csv file.
Creating migration batch for a local move where the mailboxes in the specified csv file are moved to a different mailbox database. Exporting mailboxes to a csv file. The following screen shot shows an. For example there is a mailbox migration coming.
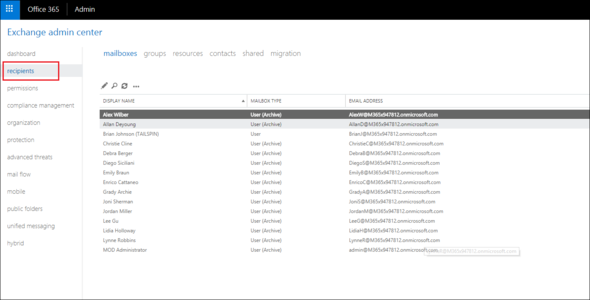
User mailboxes shown in the exchange admin center.
Mailbox Migration And Administering Exchange Online In Microsoft Office 365 Microsoft Press Store
How Kernel Office 365 Migration Software Works
How To Export A List Of Mailboxes To A Csv File

Exchange 2010 Mailbox Migration To Exchange 2016 Technet Articles United States English Technet Wiki

Navigating Imap Migrations For Office 365 Exchange Redmondmag Com

Exchange Server 2013 Move Mailbox In Using Csv Part 2 Technet Articles United States English Technet Wiki
Monitoring And Diagnostics Dashboard And Jobs Codetwo Office 365 Migration User S Manual

Find Remotehostname Url For Mailbox Migration Ali Tajran
Export Office 365 To Pst Tool To Export Office 365 Mailboxes To Pst

365 Admin Hybrid Management Part 06 Bulk Mailbox Moves Via The Eac

Office 365 Mail Import Using Csv Files Kimconnect Com

Exchange 2010 2016 Mailbox Migration Outlook Prompt Exchangeserver
Exchange To Exchange Migration Tool Upgrade Exchange 2007 2010 2013 To Exchange 2013 2016 2019 Server